Home Blog Page 5

How To Fix ‘PFN List Corrupt’ Error in Windows 10

0

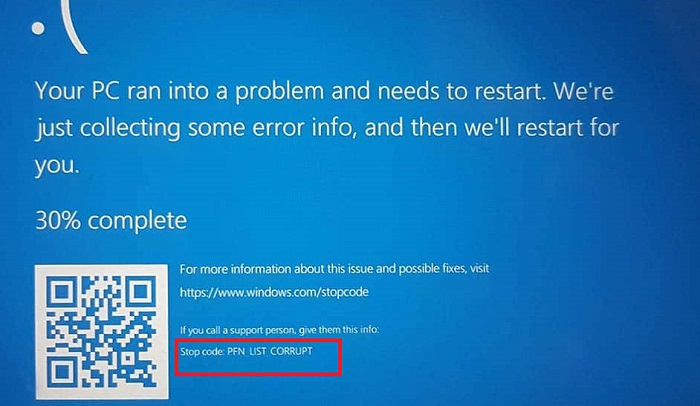
PFN stands for Page Frame Number. The PFN is used by your hard drive to determine the location of each one of your files on the disk. PFN_LIST_CORRUPT is one of the Blue Screen of Death errors.

As the name of the error suggests itself, it means the corruption of the file. After getting this error, your system will not be able to extract information or data from the hard drive. PFN List Corrupt error is deadly for your computer as you will not gonna be able to use any of your data.

PFN List Corrupt Error in Windows 10

What Causes PFN List Corrupt Error in Windows 10

This error can occur due to many reasons. Here are some common causes of PFN_LIST_CORRUPT error.

Read Also:

  1. ERR_CONNECTION_TIMED_OUT
  2. Bluetooth Not Available on Mac
  3. Thread Exception Not Handled

1. Outdated drivers: You should always keep the drivers updated as the drivers work as the bridge between the hardware and application software. When you update your drivers, the bugs from the previous version will be fixed, and new updates will also optimize the hardware.

2. Hard drive issues: If your hard drive is not working correctly, it may have been damaged, or it could get corrupted. In this situation, your data that is stored on the drive is in danger. So it is highly recommended to check your hard drive.

3. Damaged/Corrupted System Files: When the system files get infected or corrupted then the system behaves abnormally. This particular error is part of that behaviour. It must be dealt with precaution, or you can lose all of your data. It is recommended to check for damaged system and fix all the issues.

How to Fix PFN List Corrupt Error in Windows 10

There are many ways to fix PFN List Corrupt error, although each solution is for a different cause. You can try all of them to remove this error. Here are some solutions. Just follow them step by step, and you’ll be surely relieved from this error.

Solution 1: Run the BSOD Troubleshooter

BSOD means “Blue Screen of Death” as its name suggests. It indicates ‘A fatal error ‘or‘ System Crash‘. If we simply use inbuilt BSOD troubleshooter, it will show and remove any BSoD error. To run the BSOD troubleshooter simply follow the steps below.

Step 1: Press the Windows key and click on Settings.

Step 2: Then locate the Update and Security and open Troubleshooter.

Step 3: Select BSoD and Follow up on the procedure to complete troubleshooting.

Step 3: Finally, ff the troubleshooter did find out any errors then click on fix errors to remove these errors.

If this solution didn’t work out for you. You should try all the other solutions don below.

Solution 2: Run an SFC Scan

SFC stands for System File Checker. With this scan, we can scan and repair corrupted system files since corrupted files can also lead to this error. Hence to run an SFC scan simply follow the steps below.

Step 1: Press Windows key + R and type cmd then hit Enter.

Step 2: Now type the following command in cmd.

sfc /scannow

Step 3: Hit Enter.

Now a system scan will run, and it will repair all the corrupted files if it founds any. If you still facing this error, you should try out other solutions as well.

 Solution 3: Uninstall Applications That is Causing Problem

PFN List Corrupt error could also be generated due to any third-party application. Since these applications sometimes come with bugs or infected with a virus that is way too harmful to your computer. Hence it is recommended that you remove these applications temporarily. To do that simply follow the steps below.

Step 1: Press Windows key and open Control Panel.

Step 2: Get to the bottom and click on Uninstall a program.

Step 3: Select and Uninstall the applications.

Finally, restart your computer, and if the errors are still occurring, you should check out other solutions as well.

Solution 4: Run DISM

DISM means Deployment Image Servicing and Management. You can use DISM to install, uninstall, configure, and update Windows features, packages, drivers, and international settings in a .wim file or VHD using the DISM servicing commands. By running DISM, you can get relieved from this error. Simply follow the steps below to run DISM. There are two methods to run DISM.

Method 1: Standard Way

In this method, you don’t need any other resources.

Step 1: Press the Windows key and type cmd in the search bar.

Step 2: Now type the following command in cmd and hit Enter.

DISM/Online/Cleanup-Image/RestoreHealth

Let the procedure run and then finally restart your computer.

Method 2: With the Windows Installation Media

You can only use this method when you have Windows installation media.

Step 1: Insert your Windows installation media.

Step 2: Now open CMD( Command Prompt ) and type in the following commands and hit Enter.

DISM/online/cleanup-image/scanhealth 

DISM/onine/cleanup-image/restorehealth

DISM /Online /Cleanup-Image /RestoreHealth source:WIM:X:SourcesInstall.wim:1 /LimitAccess /

Step 3: Change the X to Windows drive (e.g. C ). Now let the process finish. Finally, restart your computer.

If this solution didn’t work out for you, then try other solutions as well.

Solution 5: Check for Hard Drive Corruption

If your hard drive is having issues or it is physically damaged, then PFN List Corrupt error could be caused by it. You should check your hard drive for errors. To do that simply follow the steps below.

Step 1: Restart your computer while holding the shift key it will open the Advanced Startup.

Step 2: Now choose Troubleshoot and then click on Advanced options.

Step 3: Then select Command Prompt and type in the following command and hit Enter.

exe /rebuildbcd 

exe /fixmbr

exe /fixboot

chkdisk/r

Finally, restart your computer, and if the PFN List Corrupt error persists, you should try other solutions as well.

Solution 6: Disable Microsoft OneDrive

Microsoft OneDrive is one of the essential tools in Windows 10. It is a cloud-based service that lets you store your data on the cloud. Some users reported that OneDrive was the reason behind this error. Hence you should also try it as well. To disable one drive simply follow the steps below. There are two methods.

Method 1: Using Group Policy Editor

Step 1: Press the Windows key and type “Edit Group Policy” and hit Enter.

Step 2: Then go to Local Computer Policy and click on Computer Configuration. Then click on Administrative Templates. After that, click on Windows Components then click on OneDrive.

Step 3: Now right-click to prevent the usage of OneDrive for file storage.

Step 4: Then select Enabled then click on Apply followed by OK.

Method 2: Using Registry Editor

Step 1: Press Windows key + R and type “regedit” and hit Enter.

Step 2: Then click on HKEY_LOCAL_MACHINESoftwarePoliciesMicrosoftWindows.

Step 3: Then locate OneDrive. If the key doesn’t exist, create one from the next step.

Step 4: Right-click on Windows and select New > Key and name it OneDrive.

Step 5: Now right-click on OneDrive and select NEW then DWORD(32 BIT). Name it DisableFileSyncNGSC.

Step 6: Finally double click on it and change its value to 1. Then click OK to save changes.

If you are unable to access any of these, then boot into the safe mode first. To boot into the safe mode, follow the steps below.

Step 1: Restart your computer three times straight.

Step 2: Now select Troubleshoot then Advanced Settings and then Startup Settings finally click on Restart.

Step 3: On the Restart, you’ll see a screen press F5 or 5 to boot into the safe mode with networking.

If the PFN_LIST_CORRUPT error persists, then you should try out all other solutions as well.

Solution 7: Check your Hardware

Sometimes when there a defect or problem with the hardware, it can be the cause of this error. Most commonly, RAM is the hardware that is responsible for this error. To check if your RAM is working fine or not follow the steps below.

Step 1: Download MemTest86+ software.

Step 2: Run it as an administrator. Keep it running for a few hours.

Even though RAM is the primary cause but is sure to check all the components (e.g. Motherboard, Network Card, and Graphic Card).

Also Read:

Conclusion

At the end of the article, I hope you founded your solution to PFN List Corrupt error. This error is pretty troublesome, and you should deal with it fast because your data is at risk.

How To Fix ‘Bluetooth Not Available on Mac’

0

Bluetooth is a wireless technology that came up at the end of the millennium. It is regarded as a universal wireless technology for short-range as it operates on a single radio frequency connecting multiple devices at a time.

Being compatible with almost all variants of devices, it has been in the market for over two decades. If any of your old computers are not having this feature then you can also purchase it in the form of a USB dongle.

However, with the wide range of possibilities in these days, it’s up to you if you use Bluetooth or not. In this article, we have given a complete description of how to go about with Bluetooth.

Also, if you find your Bluetooth is not working  in your Mac or any devices, we have listed pretty simple tips to fix it

Bluetooth Not Available on Mac

How to Turn on Bluetooth on Mac

Bluetooth is a built-in feature that is available on all Mac computers. If you are searching for applications to transfer some files from one device to another, then you can use Bluetooth.

Read Also:

  1. 0xC1900107
  2. PFN List Corrupt
  3. Windows Spotlight Not Working

Well, if you are not sure how to turn on Bluetooth, just go through the below steps.

Step 1: From the Apple menu, you need to navigate to the System Preferences.

Step 2: In the list of options, click on the Bluetooth option.

Step 3: Now a new window appears and you need to select Turn Bluetooth On.

Step 4: Last but not least, tick the box which contains “Show Bluetooth in the menu bar“. This will create a shortcut in the menu bar to indicate if any devices are connected, or even if any of the connected device’s battery is low.

How to Connect Bluetooth Devices to Mac

From the above discussion, you might have known how to turn on Bluetooth in your Mac device. Since Bluetooth is a wireless connection so to establish a connection between Mac and other devices a process called  ‘pairing ‘ is used. After you pair with a particular device, your PC will automatically get connected to it anytime if its in range.

Now, If you are on the verge of connecting Bluetooth devices to Mac then you must know that the Mac devices are pre-paired and it will automatically get connected when you turn on the Bluetooth option. In case, if you are using an Apple device then you need to know how to pair a device to it. So, here are the steps shown below:

Step 1: Turn the apple device On.

Step 2: From the Apple menu, go to the System Preferences.

Step 3: From the list of applications, click on Bluetooth.

Step 4: In a new window, you need to click on Turn Bluetooth On.

Step 5: Step 4 will pair your Mac with the required device. After the device pairs, click on connect and start sharing your media.

How to Connect Bluetooth Headphones to Mac

Connecting Bluetooth headphones or Bluetooth speakers to Mac is no way different from connecting Bluetooth enabled devices. If you are still confused and not able to connect Bluetooth headphones to Mac, check the below steps.

Step 1: Make sure that you enable the Bluetooth option in your headphone.

Step 2: Open the System Preferences in your Mac device.

Step 3: Click on the Bluetooth application and Turn Bluetooth On.

Step 4: On the bottom right side of the screen, you will see the list of devices. If your Headphones are shown up from the list, click Connect.

How to Fix Magic Mouse not connecting to Mac Bluetooth

If you are unable to connect Magic Mouse to Mac using Bluetooth,  try to wake up the device:

  • Make sure that the Magic Mouse Bluetooth option is On.
  • Try restarting both the devices.
  • Check if the battery of your mouse is working.

Well if still the connection issue still exists, try the  following:

Step 1: Navigate to the System Preferences and check if Bluetooth is On. If not, click Turn On the Bluetooth.

Step 2: Now, with the help of lightning cable, you need to Plugin your Magic mouse.

Step 3: After you plugin the magic mouse, you need to set up the Bluetooth. Then the Mac searches for new devices and gets connected to it.

The above-mentioned steps will definitely help you in connecting to a Magic Mouse but the setup is a bit time taking. So to make it easy, you can download the Toothfairy application which is said to be a Bluetooth assistant app. It helps you to get connected to headphones, AirPods, or any of your Bluetooth devices in just a single click.

How to Wake up Bluetooth Connection?

When you don’t use a particular connection or setup feature for a prolonged time, they get disconnected when you turn it on at once. So, to fix it you just make sure to check the below points before looking into any other troubleshooting problems.

  1. It is maybe that your device battery is low due to which you may be disconnected from using this wireless connection i.e, Bluetooth.
  2. Sometimes users forget to enable the Bluetooth On from the menu bar. So make sure to enable and check your connection.
  3. You need to make sure that the paired devices are within 30 feet. Also, be away from high-frequency gadgets as they interrupt your connection.

If these checklists didn’t help you in connecting to Bluetooth then proceed to the technical solutions which are listed below.

Method 1: Turn Bluetooth off and Back On

Though turning Bluetooth off and back on sounds silly but doing so it sometimes said to fix the problem. You can turn off Bluetooth by clicking the Bluetooth icon from the menu bar. If you have not created any shortcut in the menu bar, go to the System Preferences and select Bluetooth option then Click Turn Bluetooth Off. If this didn’t work, you can also try restarting your Mac as it removes other troubleshooting issues that Mac encounters while running Bluetooth. So, try your luck by doing the above steps.

Method 2: Disconnect all USB Devices

If the above tip didn’t work, try disconnecting all USB devices. Sometimes the USB devices get corrupted due to which you will not be able to connect Bluetooth and other applications. Here, is the procedure for you to disconnect USB devices.

Step 1: You need to go to System Preferences and select the Bluetooth option.

Step 2: Now, click on X beside the device to disconnect it.

Step 3: Close all the applications and restart your Mac.

Step 4: After restarting your Mac, you can reconnect all the devices.

Method 3: Delete the Bluetooth .plist Files

Property List (.plist) is a file that is used by Mac to save preferences of applications. They contain properties and configuration settings for various programs. If your Bluetooth module is not working then it is likely to be affected by .plist file as this file may get corrupted. So, try deleting the .plist file.

Step 1: Close all the applications that are connected via Bluetooth.

Step 2: Press Command + Shift + G in the Finder menu.

Step 3: Type /Library /Preferences/ and click Go.

Step 4: Now, you need to find the com.apple.Bluetooth.plist file and delete it.

Step 5: Lastly, restart your Mac and try connecting to Bluetooth.

Method 4: Reset the Bluetooth Module

Bluetooth is a wireless connection that works on all types of devices. Usually, you do not get any errors with the Bluetooth module but there are certain times when issues occur and become difficult to troubleshoot. Rather than giving up, another solution to fix the issue is to reset the Bluetooth module using the debug menu option.

Step 1: You need to hold down the Shift + Option key and click on the Bluetooth option in the menu bar.

Step 2: Then, click on Debug and select “Remove All Devices”.

Step 3: Click on Debug again and select “Reset the Bluetooth module”.

Step 4: After completion of resetting the Bluetooth module, you restart your Mac and check for the issue.

Method 5: Optimize and Remove Your System Junk

It is sometimes possible that you have downloaded some unknown software or application which is being interrupted with Bluetooth module. So, once you try to scan your system and remove all the system junk including the recently downloaded files.

The easiest way to remove such files is to use CleanMyMac X. Here, are the steps how the above application works:

Step 1: After downloading the CleanMyMac X application, launch it.

Step 2: Now, Scan your system. This process takes a bit time so be patient till the process completes.

Step 3: You can review the details, and click on the files which you want to delete.

Read Also:

  1. 0x800705B4
  2. Discord JavaScript Error
  3. Steam Content File Locked

Conclusion

So, if you have any trouble connecting Bluetooth to Mac, you can fix it from the above-mentioned tips.

How To Fix ‘COM Surrogate Has Stopped Working’

0

COM Surrogate Has Stopped Working is one of the most faced problems. This may happen when a printout is being taken out from an internet source and it is not noticed until a crash occurs.

The explorer uses this COM Surrogate when the user tries to extract thumbnails. The user gets many types of crashes when browsing through files and folders having media or videos thereafter.

COM Surrogate Has Stopped Working in Windows 7 8 10

While a user browses through files and folders, COM Surrogate is a host process that runs in the background [during the time of browsing]. And because of this program, the user can see file thumbnails and other information.

Read Also:

  1. 0xC1900107
  2. PFN List Corrupt
  3. Windows Spotlight Not Working

When the crash happens a process “dllhost.exe” gets displayed by the name of the COM Surrogate. And then a message pops – up on the user’s screen saying Com Surrogate has stopped working.

COM Surrogate is a fundamental process in Windows 10. When something goes wrong the Com Surrogate tries to secure the explorer from crashing and taking all of the dependency on itself. Which is the reason why people consider it to be a sacrificial process?

How to Fix COM Surrogate Has Stopped Working Error

There are some solutions below which help users to Fix COM Surrogate Has Stopped Working by themselves.

Note: The users should keep in mind that before applying and solution, they have to make sure that their Windows is updated. Many times certain problems get solved by updating the Windows.

Solution 1: Update Codecs

So many users, Update Codecs have been successful enough to fix the COM Surrogate has stopped working issue. If the user has installed Nero or DivX, then they need to make sure that they have updated them to the latest versions.

If updating the versions does not help then the user needs to uninstall and reinstall the application again. If the user has updated the codecs and the issue is still unresolved, then they have to try renaming the files.

Solution 2: Add dllhost.exe to the DEP Exception

The users can follow the steps below to understand and proceed with the solution:

Step 1: The user has to find This PC icon and Right-click on it to select properties.

Step 2: Then the user has to select “Advanced system settings” (which they can find on the left pane of the current window.

Step 3: Then on the next window the user has to select “Performance“, under which they need to click on “Settings“.

Step 4: The user has to click on “Data Execution Prevention” (The user can find it under the Performance tab).

Step 5: The next window will provide the user two options from which has to click on “Turn on DEP for all programs and services except those I select“.

Step 6: And lastly the need to click on “Add“.

Step 7: An Add pop-up box will open up in front of the user’s screen and then they have to choose executable files.

Step 8: Lastly, the user has to select the “dllhost file“.

Step 9: The user then has to click on “Open“.

Solution 3: Reregister the DLLs

The users can follow the steps below to understand and proceed with the solution:

Step 1: The user has to Right-click on the Windows icon to select “Command Prompt“.

Step 2: The user has to type the following command when the application opens.

regsvr32 vbscript.dll
regsvr32 jscript.dll

Step 3: After that, the user has to press Enter and restart the system and check whether the COM Surrogate has stopped working problem is solved or not.

Solution 4: Rollback Display your Adapter Driver

The users can follow the steps below to understand and proceed with the solution:

Step 1: The user has to open “Quick Access Menu” (they can also use the shortcut Window key + X key).

Step 2: Then the user has to select Drive Manager from the follow-up window.

Step 3: After that, the user has to find “Display Adapters” and then after selecting it the user has to expand it.

Step 4: Next, the user has to Right-click on “Display Adapter Driver” from the list. After that, they need to select the “Properties” of the same.

Step 5: Once the properties window opens, the user has to select “Driver” and finally click on “Roll Back Driver“.

Note: The user might have to check for errors like NVIDIA Driver Crashing in Windows 10 if they have any graphics like NVIDIA or AMD.

Solution 5: Scan Disk Errors

The users can follow the steps below to understand and proceed with the solution:

Step 1: Firstly, the user has to select This PC.

Step 2: Then the user has to Right-click on the disk drive which they have selected.

Step 3: Then the user has to select “Properties” from the pop-up list.

Step 4: Then the user has to select check now which will be under error checking within properties.

Step 5: Lastly, the user has to select the two options, which will be shown on the user’s screen and then click start.

Solution 6: Reset Internet Explorer

Sometimes, corrupted cached files can cause this issue. In that case, it would be best to reset the Internet explorer

The following steps will help the user to do so:

Step 1: Firstly, the user has to open the run dialog box (they can do so by pressing Windows key and R key).

Step 2: Then in the Run dialog box they need to type inetcpl.cpl and then click OK.

Step 3: Then the user has to navigate to the Advanced tab and then select Reset.

Step 4: Then the user has to check on the option Delete Personal Settings and then select reset again.

Step 5: Lastly, the users have to reboot their devices and check whether the COM Surrogate has stopped working problem persists or not.

Read Also:

Conclusion

Hopefully, one of the methods would have been useful in solving the COM Surrogate has stopped working error.

How To Fix ‘ERR_CONNECTION_TIMED_OUT ‘Issue in Google Chrome

0

Are you annoyed by the ERR_CONNECTION_TIMED_OUT error that keeps cropping up in Chrome? Don’t be concerned! Here’s how to fix the ERR_CONNECTION_TIMED_OUT problem.

The ERR_CONNECTION_TIMED_OUT error is a typical occurrence in Google Chrome on Windows 10 PCs. The bigger the problem, the more important it is to address it.

So, have a look at these three simple fixes for the ERR_CONNECTION_TIMED_OUT problem as soon as possible.

How To
How To

In Google Chrome, How Do You Fix ERR_CONNECTION_TIMED_OUT

Method 1: In Windows, Hosts File

The ERR_CONNECTION_TIMED_OUT problem can be fixed by making a few changes to the hosts file, which contains the IP and protocols for the TCP/IP models.

Read Also:

  1. 0xC1900107
  2. PFN List Corrupt
  3. Windows Spotlight Not Working

To change these host files, follow the steps below:

Step 1 – Open the Windows search menu and look for Notepad.

Step 2 – Next, right-click on the Notepad option and select Run as Administrator from the context menu.

Step 3 – The notepad will be displayed. Now select File from the drop-down menu.

Step 4 – Next, go to C:WindowsSystem32driversetc and select Open.

Step 5 – From the viewable list of files, open the host’s file. It will most likely be the first choice displayed.

Step 6 – Attempt to read the file now. At the conclusion of hash-tags, you’ll find a couple of IP addresses and URLs.

Step 7 – After that, select all of those IP addresses and URLs and remove them altogether.

Step 8 – To save the updated host’s file, go to File and then Save.

Step 9 – Last but not least, restart your computer.

Examine the ERR_CONNECTION_TIMED_OUT error once more. If the issue persists, move on to the next step.

Method 2: Renew or Flush Your DNS

The browser may still be utilising an old DNS (Domain Name System) that is no longer valid, resulting in the ERR_CONNECTION_TIMED_OUT error. You’ll need to flush or renew your DNS in this scenario.

To flush your DNS, follow the steps below:

Step 1 – To begin, hold down the Windows key and the X key at the same time.

Step 2 – Next, go to the bottom left corner of your screen and click Command Prompt (Admin).

Step 3 – A command prompt window will appear on the screen. To use the clipboard, make sure that Quick edit mode is turned on.

One by one, type the following commands into the command prompt window: (Remember to hit enter after each command)

netsh winsock reset ipconfig /flushdns ipconfig /registerdns ipconfig /release ipconfig /renew

Step 4 – Last but not least, restart your computer.

Method 3: Delete the Data in the Browser

For the majority of browser-related issues, clearing the browser’s data is the best solution.

To delete the browser’s data, follow the steps below:

Step 1 – To begin, right-click on your Google Chrome browser and select “Run as administrator.”

Step 2 – Select History from the menu or press Ctrl and H at the same time.

Step 3 – Finally, pick the option to Clear Browsing Data.

Step 4 – Select the Beginning of Time, as well as all of the underlying options, such as Browsing History, Download History, Cookies and Other Site and Plug-in Data, Cached Images and Files, Auto-Fill form Data, and Passwords.

Step 5 – Finally, select Clear Browsing Data and wait for Chrome to complete the process.

Examine the ERR_CONNECTION_TIMED_OUT Error once more.

Read Also:

  1. 0x800705B4
  2. Discord JavaScript Error
  3. Steam Content File Locked

Conclusion

Hopefully, one of the three techniques above was successful in resolving the ERR_CONNECTION_TIMED_OUT problem. You may now enjoy error-free browsing once more.

How To Fix System ‘Thread Exception Not Handled’ Error

0

The System Thread Exception Not Handled error is another typical problem that customers are encountering these days. You can’t log into Windows because of the error. Typically, the System Thread Exception Not Handled problem happens while your computer system is booting up.

How To
HOW TO

System Thread Exception Not Handled Error

The System Thread Exception Not Handled problem can be caused by a number of factors. Incompatible drivers are the most common cause. Don’t be concerned! Here are four easy solutions for quickly resolving the inconvenient System Thread Exception Not Handled problem.

Read Also:

  1. 0xC1900107
  2. PFN List Corrupt
  3. Windows Spotlight Not Working

Method 1: Renaming the Dilemmatic Driver to Fix System Thread Exception Not Handled Error

To rename the driver, follow the steps below:

Step 1 – First and foremost, insert the Windows Recovery Drive or System Repair Disk into your machine.

Step 2 – Select your preferred language and then click Next.

Step 3 – In the bottom left pane, go to Repair.

Step 4 – Select the Troubleshoot option and then ‘Advanced Option’.

Step 5 – Now, go to the Command Prompt menu and enter in the commands one by one:

C:cd\windows\system32\drivers

FILENAME.OLD FILENAME.sys ren FILENAME.sys

Step 6 – Finally, type Exit to exit the command prompt and close it.

Step 7 – Last but not least, restart your computer.

Repeat your search for the Thread Exception Not Handled problem. If the issue persists, move on to the next step.

Method 2: Remove the Error-Producing Driver

It’s possible that faulty drivers are to blame for the issue. In this instance, removing such a driver is the most obvious answer.

To uninstall the problematic driver, follow the steps below:

Step 1 – First and foremost, insert the Windows Recovery Drive or System Repair Disk into your machine.

Step 2 – Select your preferred language and then click Next.

Step 3 – In the bottom left pane, go to Repair.

Step 4 – Select Troubleshoot from the drop-down menu, then Advanced.

Step 5 – Now, choose Command Prompt and type the following command, pressing Enter: legacy bcdedit /set default bootmenupolicy

Step 6 – Finally, type Exit to exit the command prompt and close it.

Step 7 – Last but not least, restart your computer.

Step 8 – To access the Advanced Boot Option page, keep pressing the F8 key.

Step 9 – Finally, choose Safe Mode.

Step 10 – To enter the execute command dialogue box, press the Windows Key and R at the same time.

Step 11 – In the Run command dialogue box, type devmgmt.msc.

Step 12 – The device managers will appear on the screen. Remove the problematic drivers from the device managers.

Step 13 – To uninstall a driver, right-click on it and pick uninstall from the menu. Then, to confirm Uninstallation, click OK.

Step 14 – After that, go back to the official websites and reinstall the updated drivers.

Step 15 – Last but not least, restart your computer.

Repeat your search for the System Thread Exception Not Handled problem. If the issue persists, move on to the next step.

Method 3: Restoring Your Computer

To restore your computer system to a previous state, follow the steps below:

Step 1 – First and foremost, insert the Windows Recovery Drive or System Repair Disk into your machine.

Step 2 – Select your preferred language and then click Next.

Step 3 – In the bottom left pane, go to Repair.

Step 4 – Select Troubleshoot from the drop-down menu, then Advanced.

Step 5 – To restore your computer system, click System Restore and follow the onscreen instructions.

Step 6 – To complete the process, restart your computer system.

Repeat your search for the System Thread Exception Not Handled problem. If the problem remains, move on to the next step.

Method 4: Experiment with Hardware Acceleration

It is a last-resort solution. If none of the solutions above were successful in resolving the System Thread Exception Not Handled problem, consider using hardware acceleration only when absolutely necessary.

Step 1 – Open a new tab in Google Chrome.

Step 2 – Now, from the menu icon, select Settings. Then, at the bottom, select Show Advanced Settings.

Step 3 – Uncheck the box next to the option to Use Hardware Acceleration When Required.

Step 4 – To make the modifications take effect, restart your computer system.

Read Also:

  1. 0x800705B4
  2. Steam Content File Locked
  3. Discord JavaScript Error

Conclusion

Hopefully, one of the four solutions listed above was successful in resolving the System Thread Exception Not Handled problem. It’s yet another annoyance that detracts from the user experience. Such complex faults, on the other hand, can be solved with a little patience and hard work.

How To Fix ‘Discord JavaScript Error’

0

When Discord is launched on the machine, the error “A JavaScript Error occurred in the main process” occurs. Users do not interpret the error message, which specifies or contains information about the error.

How To
HOW TO

Discord JavaScript Error How to Resolve

The majority of the methods for resolving the Discord JavaScript Error are listed below, along with the instructions for each.

Read Also:

  1. Thread Exception Not Handled
  2. ERR_CONNECTION_TIMED_OUT
  3. COM Surrogate Has Stopped Working

 1. Add Discord Installation Files to Antivirus Software’s Whitelist

Antivirus programmes frequently target Discord installation files, ultimately stopping the installation process. It gets alerted with the fatal JavaScript Error notice at this moment. The “Discord voice” recovery file is a frequent file that is targeted by antiviral software.

As a result, there is a simple technique for resolving the issue, which involves a basic antivirus bypass. To do so, go to the quarantine vault within the antivirus software you’re using. The steps are as follows:

Step 1 – To begin, double-click on the Avast icon or right-click on the Avast tab in the Windows Applications section to launch it.

Step 2 – Next, go to the “Protection” tab. Inside, there are a number of sub-options. Locate the virus chest and open the tab.

Step 3 – The virus chest now contains the files that the antivirus software considers to be insecure. Those files have been quarantined by Avast, and the system has been recovered.

Step 4 – Next, look for files that are linked to Discord; files that are linked to Discord will contain Discord in the name.

Step 5 – After locating the files, click on the three points that appear and linger over them. Choose “Restore and add an exception” from the drop-down menu that displays.

Step 6 – Repeat this process for any Discord-related files. Then resume the installation procedure after you’ve finished it.

After that, add a folder in Avast and specify that Discord installation files are not hazardous to the system to ensure that this mistake, the antivirus, does not occur again.

Follow the steps below to get started:

Step 1 – To begin, open the Avast user interface as described above.

Step 2 – Then, among the different options in the upper right corner, select “Menu.” After that, choose “Settings” from the drop-down menu.

Step 3 – After you’ve finished configuring, click the “General” button on the left side. In the General section, go to the “exceptions” tab.

Step 4 – Now you can create an exception folder that instructs the antivirus to let the system access and use certain files.

Step 5 – Next, choose the “Add exception” option and navigate to the Discord folder and installation files. After that, click “Add exception” and restart Discord.

 2. Delete Discord Files in %localappdata% And %AppData%

Discord typically saves temporary data on the operating system, which aids in regular operations or in a variety of situations. To give Discord clear execution, these files should be destroyed while the programme is running, without causing a JavaScript Error or any other issues.

After the files are erased, though, the Discord settings are reset. It also fixes the JavaScript problem that prevents Discord from loading. The steps to delete the files are as follows:

Step 1 – Go to C:UsersYOURUSERNAMEAppData on your computer.After opening Windows Explorer and selecting this PC, Discord will appear. Then turn on the feature that allows you to see hidden files and folders.

Step 2 – Now, under the file explorer menu, select the View tab option. Then, under the show/hidden section, click the Hidden items option checkbox.

Step 3 – The hidden files will be visible in File Explorer; so, this choice should be remembered until it is changed again. Delete the Discord folder from the AppData folder.

Step 4 – After receiving a notification stating that some files could not be erased because they were in use, try to end the process in the taskbar.

Step 5 – Next, select the Start or Search option from the drop-down menu. Then type Run or press the Window + R key combination to bring up the dialogue box.

Step 6 – Next, locate the Discord folder in the newly opened folder and right-click on it, then select the Delete option.

Step 7 – Finally, double-check that the folders have been completely erased and that no files have been left unchecked. Also, check to see whether the problem has been resolved.

 3. Uninstall Discord and Reinstall It

The most significant method is re-installation, which has proven to be effective for a number of other people who have encountered this issue. Here are the steps to take to accomplish this:

Step 1 – Make sure you’re logged in as an administrator account because the apps can’t be removed from any other account. Then, from the start menu, select Control Panel.

Step 2 – In the Control Panel, select View as a category in the upper right corner. Then, in the Software section, select the Uninstall programme option.

Step 3 – Then, while using the settings, click on Application. Open the application and a list of the programmes that are now running in your operating system will appear. After you’ve found Discord in the Control Panel or Settings, click uninstall.

Step 4 – The Discord Uninstall wizard will then appear, prompting you to select “fully uninstall Discord from the system.” Yes is the answer.

Step 5 – When the process is finished, click the Finish button. After uninstalling it, download the current version from the website and reinstall it.

Read Also:

  1. 0xC1900107
  2. PFN List Corrupt
  3. Windows Spotlight Not Working

Conclusion

So these were the answers to the Discord JavaScript Error, and they should serve as a saviour and save the file and folder from the error if you encounter it.

Windows Update Error ‘0x800705B4’

0

Many issues occur throughout the Windows updating procedure. The ‘Windows update error code 0x800705b4’ is one of these errors. When attempting to upgrade older Windows versions to newer versions, the 0x800705b4 error will appear.

The 0x800705b4 problem is annoying since it causes the download to pause and prohibits any further updates. The Windows Defender System’s operation is the most common cause of the ‘Windows Error Code 0x800705b4’ problem.

The Windows defender system sometimes prevents the download from starting. This is due to the fact that the obsolete Defender Systems are unable to handle the update.

How To
HOW TO

Other than the Windows Defender system, the ‘Windows update error code 0x800705b4’ issue might be caused by obsolete or corrupted system components, configurations, and third-party software.

Read Also:

  1. Thread Exception Not Handled
  2. ERR_CONNECTION_TIMED_OUT
  3. COM Surrogate Has Stopped Working

How to Fix Error 0x800705b4 in Windows Update

Don’t be concerned! Here are seven fast fixes for the ‘Windows update error code 0x800705b4’ problem that you should try.

1. Troubleshooter

Troubleshooting can assist you in resolving update issues. So, give it a shot and run the troubleshooter by following the steps below-

Step 1- To begin, look for troubleshoot in the’start’ option and execute it.

Step 2- A troubleshooting window will appear on the screen. Select ‘Windows update’ from the list of alternatives.

Step 3- Select ‘advanced’ from the drop-down menu.

Step 4- After that, click next and select ‘run as administrator.’

Step 5- When difficulties with the update emerge, simply follow the on-screen directions to resolve the issue.

Restart your computer and update your Windows. If the ‘Windows update error code 0x800705b4’ problem reappears, proceed to the next step.

2. Launch Windows Defender

To activate Windows Defender, follow the instructions below-

Step 1- To enter the run command dialogue box, press the ‘Windows’ key and ‘R’ at the same time.

Step 2- Then, in the run command dialogue box, type’services.msc’ and hit Enter.

Step 3- In the services panel, go to the ‘Windows Defender’ option.

Step 4- Verify that the status column is set to ‘Started/Running.’ If the column remains blank, right-click on the ‘Windows defender’ option and choose’start.’

Step 5- Return to the services option if the notification “Windows Defender requires being force-started” appears. then select ‘automatic’ as the startup type.

Step 6- Right-click on the startup type and select properties. Then, from the drop-down menu, choose ‘automatic.’

Step 7- Shut down and restart your computer.

Re-check for the error. If the problem persists, move on to the next step.

 3. Using the Property “Background Intelligent Transfer Service”

To use the background intelligent transfer service, follow the steps below-

Step 1- To launch the run command dialogue box, first press the ‘Windows’ key and ‘R’ together.

Step 2- In the run command dialogue box, type’services.msc’ and hit Enter.

Step 3- In the services box, select the ‘Background Intelligent Transfer Service’ option.

Step 4- Select’stop’ from the ‘Background Intelligent Transfer Service’ option by right-clicking on it.

Step 5- Next, right-click on the ‘Windows Update’ option.

Step 6- From the drop-down menu, select’stop.’

Step 7- Finally, search for ‘Software Distribution’ under the ‘This PC’ option.

Step 8- Next, empty or remove all of the files in the’software distribution’ folder, then restart your computer.

Attempt to update your system once again. If the issue persists, move on to the next step.

 4. Changing the Windows Update Panel’s Settings

To alter the settings for the Windows update panel, follow the instructions below-

Step 1- First and foremost, launch the Windows Update Panel. To access it, type ‘Check for updates’ into the search box or go to the ‘Settings’ menu and select the ‘update and security’ option from the drop-down menu.

Step 2- Select ‘Advanced options’ from the ‘Windows Update’ screen that appears.

Step 3- Uncheck the option that says “Give me updates for other Microsoft programmes when I upgrade Windows.”

Step 4- Shut down and restart your computer.

Step 5- Return to the ‘Windows Update’ page.

Step 6- Finally, select ‘Check for updates.’

Step 7- Once you’ve received the notification “Your device is up to date,” go back to the Options menu and select “Give me updates for other Microsoft products when I upgrade Windows.”

If you’re still having trouble updating Windows, try the next option.

5. Disabling Third-Party Software 

To disable third-party software installed on your computer, follow the instructions below-

Step 1- Identify any third-party antivirus software or firewalls that may be installed on your computer.

Step 2- Then, disable these antivirus software and firewalls.

Step 3- Finally, activate the built-in Windows firewall.

If you like, you can enable the third-party firewalls and antivirus afterwards. However, it is not recommended that such software be installed. This is because third-party software is untrustworthy and may attempt to change your system settings, resulting in issues such as the ‘Windows update error 0x800705b4’.

You can, however, always use the built-in Windows firewall or a legitimate antivirus. Check to see if the issue appears once more. If the problem persists, move on to the next step.

6. Using the Media Creation Tool

You may easily download the update using the ‘media creation tool.’ This is due to the fact that the media production tool works on the premise of creating distinct ISOs for updating. It also ensures that the original files are preserved.

7. Using a Different Strategy

You can try resetting your computer and reinstalling the update. It could be able to assist you in overcoming the error. To resolve the ‘Windows update error 0x800705b4’ issue, you can also try updating your drivers.

To update your drivers, follow the procedures below-

Step 1- To begin, press and hold the ‘Windows’ and ‘X’ keys at the same time. Now, from the list of options in the bottom left corner, select device management.

Step 2- Next, select the out-of-date driver. Select ‘upgrade the driver software’ from the context menu by right-clicking on it.

Step 3- A new driver will be installed if one is required.

Read Also:

  1. 0xC1900107
  2. PFN List Corrupt
  3. Windows Spotlight Not Working

Conclusion

Hopefully, one of the seven ways listed above was successful in resolving your ‘Windows update error 0x800705b4’ problem. Finally, you’ll be able to upgrade your Windows to a newer version and take advantage of a variety of new features as well as a speedier user experience.

How To Fix ‘Steam Content File Locked’ Issue

0

The ‘Fix Steam Content File Locked’ error is one of the most common problems that customers confront these days. The problem could be caused by a number of factors, including corrupted files, an out-of-tune Winsock, or anti-virus software.

Relax! This post is solely dedicated to resolving the solve Steam Content File Locked Issue. The error is extremely inconvenient, and the only way to resolve it is to precisely target the core causes of the Steam Content File Locked Error.

How To
How To

What Should I Do If My Steam Content File Is Locked?

We’ve got four quick and easy remedies for the most common causes of Steam Content File Locked that you should try.

Read Also:

  1. Thread Exception Not Handled
  2. ERR_CONNECTION_TIMED_OUT
  3. COM Surrogate Has Stopped Working

Method 1: Turn Off Your Antivirus 

Only a few applications are allowed to pass past your anti-thicket. virus’s However, the anti-virus creates barriers for others, limiting and interfering with the system’s normal operational functionality.

In this scenario, disabling the antivirus appears to be a viable remedy for the Steam Content File Locked Error. Although each anti-virus programme has its own technique for disabling it, we’ll go over the most typical one. Your antivirus programme will also offer a similar technique for disabling it.

To disable anti-virus, follow the procedures below:

Step 1: Go to the Settings menu. Then locate and select the ‘Updates and Security’ option.

Step 2: Locate and choose Windows Security. Then go to Virus and Threat Protection and click on it.

Step 3: Go to ‘Manage Settings’ and select ‘Off’ for real-time protection.

Check to see if the problem reappears.

It’s important to keep in mind that turning off your antivirus leaves you open to virus and malware threats. To avoid such dangers, utilise only trusted websites and programmes. Also, only utilise this procedure as a last resort.

 2. Recover Files That Have Been Corrupted

The most likely cause of the Steam Content File Locked issue is corrupted files. These corrupted files cause major problems by distorting the system’s operating functionality. As a result, in this instance, fixing the corrupted data is the best option.

To repair the corrupted files, follow the procedures below:

Step 1: Exit Steam and then access the Steam Directory you specified during the installation of the application on your computer.

Step 2: Go to the ‘logs’ folder and open it. Then, in the logs folder, look for ‘txt.’ and select it.

Step 3: Scroll to the bottom of the ‘txt.’ file to find the most recent problems.

Step 4: Locate the mod’s ‘root folder.’

Step 5: Close Steam and relaunch it. Go to the download folder and open it.

Step 6: Once you’ve accessed the download folder, you’ll see an update. To fix the problem, update the necessary files.

If the error was caused by corrupted files, this procedure should have resolved the ‘Fix Content File Locked’ issue. If the problem persists, it is likely that there is another cause for the error. So, go ahead and attempt the next solution.

3. Retune Winsock 

Another reason of the issue is an out-of-tune Winsock. Returning the Winsock will resolve the Steam Content File Locked issue in this scenario.

To retune Winsock, follow the instructions below:

Step 1: To launch the run dialogue box, press the Windows Logo key and R at the same time.

Step 2: In the run command dialogue box, type ‘netsh winsock reset’.

Step 3: Type the commands you want to run and press ‘Enter’.

Check to see if the problem persists. If the error does not display, the issue was most likely with the Winsock. However, if the problem persists, attempt the next solution to resolve the Steam Content File Locked.

4. Move Steam Installation 

The major reason of the problem is sometimes a continual positioning of the Steam installation and game files. In this scenario, relocating the Steam installation and game files may be helpful in resolving the problem.

To rearrange Steam and game files, follow the procedures below:

Step 1: Find your ‘Steam Client’ in the first step. Then select ‘Settings’ from the drop-down menu.

Step 2: Locate and click on ‘Downloads.’ Then locate and open the ‘Steam Library’ Folders.

Step 3: Select ‘Add Library Folders’ and a new path where you want Steam to be saved. Similarly, you can select the desired location for all other Steams and game files that you have installed.

Step 4: Close the ‘Steam’ application. Then, figure out where your Steam account is currently located.

Step 5: Remove all files and folders except the ‘Steam Apps and user data’ folder from the location.

Step 6: Copy all of the files and folders from the old directory to the new one that was created earlier.

Step 7: Restart Steam and log in again.

Check to see if the problem persists. If the error is no longer present, the cause of your concern was the location of the Steam and game files. You were able to resolve the issue with the Steam Content File being locked by repositioning.

However, if the problem persists, use the next way to fix theSteam Content File Locked error.

Read Also:

  1. 0xC1900107
  2. PFN List Corrupt
  3. Windows Spotlight Not Working

Conclusion

Cheers! Surely, one of the ways listed above was successful in unlocking the Steam Content File. Make sure you follow the instructions to the letter.

Find the root cause of the Steam Content File Locked error first, and then use the appropriate way to fix the error in your computer system, and you’ll be left with a healthy, functional computer system once again.

Error Code ‘0x80300024’ When Installing Windows

0

The problem 0x80300024 occurs when Windows is installed in an operating system. It’s one of the most difficult challenges you’ll ever encounter.

The problem message “Windows is unable to install in the selected location” is also included in this error code. As a result, it acts as a roadblock or stumbling block when installing a Window in an operating system.

Furthermore, the error number 0x80300024 describes some of the issues relating to the hard drive partition, which is the destination of the Windows installation, such as software or hardware. The appearance of the error code 0x80300024 might be caused by a number of factors.

How To
HOW TO

Insufficient disc space on the target device, or damaged/corrupted installation media, such as a damaged, dying, or otherwise corrupted hard drive, are among them. These were the factors that contributed to the inaccuracy.

Read Also:

  1. Discord Mic Not Working
  2. Unexpected Store Exception
  3. NVIDIA Installer Cannot Continue

How to Fix Error Code 0x80300024 During Windows Installation

There are several solutions to these errors listed below, along with the actions to remedy the problem and prevent it from happening again. If you encounter this issue on your machine, use the methods outlined below to resolve Error Code 0x80300024.

 1. Disconnect 

When the system is linked to more than one hard drive, and the installation is being conducted on one of those hard drives, the other drive may cause interference while Windows is being installed.

As a result of the installation failure, an error code of 0x80300024 will appear on the screen. To address this issue, follow the instructions outlined below:

Step 1 – Remove the hard drive from the machine that will not be utilised during the installation of Windows.

Step 2 – Run through the entire installation procedure again to see whether the problem still exists.

If the problem persists after completing the instructions above, it is unlikely that the hard disc is to blame. In the meantime, look into alternative options for resolving the issue that arises during the installation of Windows.

 2. Different USB Port

The Windows operating system, on the other hand, may be installed using a USB drive and the proper installation media. The difficulty may be caused by the USB port under which the installation media is a plugin, as most users use this approach to install Windows in their system via USB.

Furthermore, if this is the primary cause of the problem, try resolving it by installing Windows using a USB port and inserting the installation disc in a new USB port, i.e. switching from a USB 2.0 port to a USB 3.0 port or vice versa, and seeing if the problem is cured.

 3. Verify 

Furthermore, the hard disc it is installed on may not be at the top of the computer’s boot order, which could be the root of the problem.

On startup, the computer always tries to boot the operating system, which is configured in the BIOS of most computers. To fix the problem, make sure the target hard disc is at the top of the boot order on the machine. To do so, follow the steps outlined below:

Step 1 – To begin, turn on the computer.

Step 2 – The first screen that shows on the computer upon boot up has instructions to hit a specific key, which is usually DELETE F1 OR F2, to enter the BIOS/setup of the computer. Press the required key to access the BIOS.

Step 3 – In the BIOS, look for the computer’s boot order/configuration. The boot order is usually found in the BIOS boot tab. After that, change the boot order to put the hard drive where Windows is installed at the top.

Step 4 – Finally, leave the BIOS of the computer to ensure that the modifications have been preserved and updated.

4. Format the Installation Location 

On the contrary, formatting the installation location before installing Windows on the computer is recommended because it is often the source of the problem, and formatting the location can solve it.

As a result, resolve the 0x80300024 error code difficulties. As a result, formatting an installation location is unquestionably a viable option.

Here are the steps to take to accomplish this:

Step 1 – On the computer, first install the bootable Windows installation disc and then restart it. If Windows Installation media isn’t in use or isn’t ready to use, it must be generated.

Step 2 – After the machine has started, select to boot from the inserted installation disc. Then select your preferred computer language, keyboard layout, and other options.

Step 3 – Select Custom from the drop-down menu. When it asks you where you want Windows to be installed, select Drive first (advanced).

Step 4 – Next, select the partition of the computer’s hard drive that holds the Windows installation. Then click on the format option after selecting the installed Windows.

Step 5 – Finally, confirm your action.

Step 6 – After the HDD partition has been entirely formatted, click Next to continue with the installation.

5. Get a New Hard Drive

Replacing the hard disc is one of the most effective ways to resolve the error. It’s because, in the vast majority of situations, the computer’s hard disc is dying or has already died.

Installing a Window in an operating system can be thwarted by a failing hard disc. Furthermore, it is strongly advised that the hard drive be replaced with a new one. It will undoubtedly assist you in resolving the 0x80300024 problem code.

Read Also:

  1. MSDIA80.Dll
  2. ERR_NAME_NOT_RESOLVED
  3. Api-Ms-Win-Crt-Runtime-l1-1-0.Dll

Conclusion

One of the most effective strategies for resolving the error code 0x80300024 is to follow the procedures indicated above.

The user claims that the procedures are sufficiently effective and efficient to solve the problem. And when confronted with this issue, these methods should undoubtedly be used.

How To Access ‘Steam Screenshot Folder’

0

It’s quite the rage these days to publish your Steam Screenshot or post it to your social media accounts.

In any Steam game, you can use a hotkey (the default is F12) to take a snapshot of the current in-game Screen, which you can subsequently upload to your Steam profile or other social media accounts. However, finding the Steam Screenshot Folder might be a bit of a maze at times.

How To
How To

How Do I Get Into The Steam Screenshot Folder

You have two options for getting to your Steam Screenshot Folder:

The Screenshot manager in Steam can be used to access the Steam Screenshots.
Steam Screenshots can also be accessed from your hard disc storage. Let’s have a look at how to use the two ways in more detail.

Read Also:

  1. Discord Mic Not Working
  2. Unexpected Store Exception
  3. NVIDIA Installer Cannot Continue

Method 1: Using Steam Screenshot Manager to Access Steam Screenshots

First, we’ll go through how to use the Steam Screenshot manager to get access to your Steam Screenshots.

To view your Steam Screenshots via the Screenshot manager, follow the instructions below:

Step 1- First and foremost, open your Steam window.

Step 2- Locate the ‘View’ option in the upper left corner of your Screen and click it to bring up a drop-down menu.

Step 3- Locate the Screenshots Option in the drop-down menu and select it.

Using the Screenshot manager, you can quickly locate, upload, or remove the required Steam Screenshot. You can also look for Steam Screenshots using the method below.

Method 2: Using Your Hard Drive Storage to Get To The Screenshot Folder

Every device has a separate Folder on its hard drive that stores all of the Screenshots taken in-game. You’ll discover the Folder in which Steam is now installed. The default location, however, is Local disc C.

Using this way, you can quickly retrieve the Steam Screenshots.

What Is The Best Way To Find Your Steam User ID?

Many people have experienced the difficulty of forgetting or not knowing their Steam ID. Your Steam ID can be accessed through the Steam client.

To access your Steam ID using the Steam client, follow the instructions below:

Step 1- Launch the Steam Client.

Step 2- Select ‘Settings’ from the ‘View’ menu.

Step 3- Navigate to the user interface. There’s a box there that says “Display Steam URL Address When Available.”

Step 4- Select the box and click OK.

Step 5- Next, go to your Steam Profile and select View Profile from the drop-down menu. Your Steam ID is the number at the end of the URL.

Then, as mentioned in the previous techniques, use your Steam ID to locate your saved photographs.

Read Also:

  1. MSDIA80.Dll
  2. ERR_NAME_NOT_RESOLVED
  3. Api-Ms-Win-Crt-Runtime-l1-1-0.Dll

Conclusion

You can get the Steam Screenshots via either of the two options, depending on your preference. Without a doubt, one of the solutions listed above would have assisted you in locating your Steam Screenshot Folder.

Now you can effortlessly share your Steam Screenshots on your social network accounts or upload them to your Steam profile, allowing you to enjoy your games once more.